I wrote previously about creating an emergency kit to keep in your home in case of a natural disaster, like a tornado, or in case extreme weather isolates you from basic services. I have also written about creating an emergency bag for your vehicle.
But what if you have to leave your home for some reason? This is where a 72 Hour Bag (also called a “bug out” bag) can make a huge difference in your family’s comfort and safety. Three days (72 hours) is about the range of time you and your family may have to survive on your own or in a shelter until rescue teams can reach you. It’s recommended that people have this type of kit in their homes and accessible as part of your natural disaster preparedness plan.
(Disclosure: Some of the links below are affiliate links, meaning, at no additional cost to you, I will earn a commission if you click through and make a purchase.)
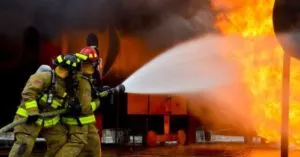
Where I live, we have frequent forest fires. Sometimes a fire will threaten homes, and the residents have very little time to evacuate.
What if a rail car or a semi filled with chemicals derails or tips over nearby, releasing a cloud of hazardous chemicals into the air, and your home is in the drift area?

There may come a time you have to leave your home in a hurry. A 72 Hour Bag can help make sure you and your children have the essentials needed until you can return home, or be taken to shelter.
These are relatively easy to create, and shouldn’t take up much room. It’s best to store these in your closet/your child’s closet until they are needed. That way, everyone can grab their individual backpack and go when necessary.
BACKPACK
You can find these anywhere. You may even have a couple laying around at home already. Or pick up a couple when you are doing your back to school shopping. Or check out the selection at your local Goodwill or thrift store – you can find gently used backpacks there for hardly any money. Choose a backpack that is sturdy, easy to carry, and large enough to store all the essentials you will need to take with you.
WATER
- Water bottles
- Water pouches
- LifeStraws
Pack water bottles or pouches, and you might consider putting in some LifeStraws as well. These can be a real life saver.
FOOD
- Granola bars
- Protein bars
- Dried fruit
- Beef jerky
- Peanut butter crackers
Granola bars or protein bars are great to use in your 72 Hour Bag. They are small and lightweight, ready to eat, and are nutrient dense. You can also pack dried fruit or fruit leather, and/or peanut butter crackers. Think ready to eat foods that have a long shelf life. OK … I know that we are all trying to eat less preservatives, and preservatives are what give foods a long shelf life … but honestly, in the middle of an emergency is not the time to be worried about that. You will want foods that are high in calories, small and lightweight, and ready to eat. You may not be able to prepare and cook your food.
LIGHT/HEAT
- LED flashlight
- Headlamp
- Glow sticks
An LED flashlight, headlamp, or glow sticks (or any combination thereof) should be included. If it’s the middle of the night, you’ll want to be able to see where you are going.
- Space blanket
- Rain poncho
- Hand warmers
A space blanket is small and lightweight (we keep circling back to that, don’t we) and could be used as a blanket, or made into a small shelter if necessary. You can find cheap rain ponchos many places (try the Dollar Store), and they will not only keep you dry but trap body heat to keep you warmer when you are outside.
CLOTHING
- Sweatshirt and sweatpants
- T-shirt
- Wool socks
- Gloves/hat
- Extra shoes
If you can’t get back to your home for a few days, you will be thankful for a change of clothes. And an extra set of clothes is always nice to have if the clothes you are wearing get wet. No one likes to wear wet clothes; plus, it makes you colder. An extra t-shirt could come in handy, and it can be rolled up and won’t take up much space. Wool socks, hat, and gloves will keep you from losing heat through your extremities when it’s cold outside. An extra pair of shoes (think cheap pair of tennis shoes) will give you an option if your other shoes get wet. Try to use shoes that are sturdy and waterproof, in case of rough weather.
Here are a few other helpful items to include:
- a whistle – without a signal or battery strength on your cell phone, you have no way to communicate. A whistle will help you signal to rescuers when you’re in distress and need to get someone’s attention.
- Cash – for extra supplies, etc. An ATM may not be available, so pack some cash just in case.
- Battery-powered radio – this will help you stay up-to-date on emergency broadcasts and conditions.
- Toilet paper/wipes
- Hand sanitizer
- Garbage bags
- Bleach or disinfectant
- Travel-size toothbrush and toothpaste, wet wipes, soap, brush/comb
You might also think about packing a small tube tent or emergency tent. This is a quick and easy shelter idea.
With just a little planning, and a trip to your local Dollar Store or discount store, you can have a 72 Hour Bag ready to go in case an emergency drives you out of your home for a few days. Use the tips in this post, and have the peace of mind knowing that you and your children are prepared, “just in case.”
Easy Laundry Room Organization Tips
Back To School Organization for Mom
Heart Disease – Healthy Changes To Lower Your Risk
Please share this article if you found it helpful. I’d love for other folks to be able to find it. Thanks!

Joan Merrell is a solo mom to two daughters, a widow, and a security technician at Oregon State Hospital. Oregon native, farm girl and 4H leader, maker of homemade bread and chocolate chip cookies, she balances (more or less) full-time work with caring for a home filled with a teenage daughter, 2 entitled cats, and a hyper German Shepherd. She enjoys gardening and hiking, reading Ted Dekker and Frank Peretti novels, and searches for a few spare minutes to communicate with her grown daughter and son-in-law on her Marco Polo app. Find out more about Joan here.